Spring Cloud Config
Spring Cloud Config provides server-side and client-side support for externalized configuration in a distributed system.
With the Config Server, you have a central place to manage external properties for applications across all environments. The concepts on both client and server map identically to the Spring Environment and PropertySource abstractions, so they fit very well with Spring applications but can be used with any application running in any language.
As an application moves through the deployment pipeline from dev to test and into production, you can manage the configuration between those environments and be certain that applications have everything they need to run when they migrate. The default implementation of the server storage backend uses git, so it easily supports labeled versions of configuration environments as well as being accessible to a wide range of tooling for managing the content. It is easy to add alternative implementations and plug them in with Spring configuration.
Component
- Config Server
- Config Client
Tools Required
- IDE ( Intellij )
- Gradle
Config Server
First create a new project called config server, I am using the sample which i am using for my hobby project Cloud-odo
There are 3 ways you can store the configuration files
- GIT Repository
- Vault
- Local Files
In this post, we will see about the Local Files
Create the Main method for application initialization with the annotation @EnableConfigServer along with @SpringBootApplication
In the application.conf file set the search locations for the config files and spring.profiles.active as native
Create a file under the config files location with name format {application-name}-{application-profile}.properties
e.g : test-dev.properties , test-prod.properties
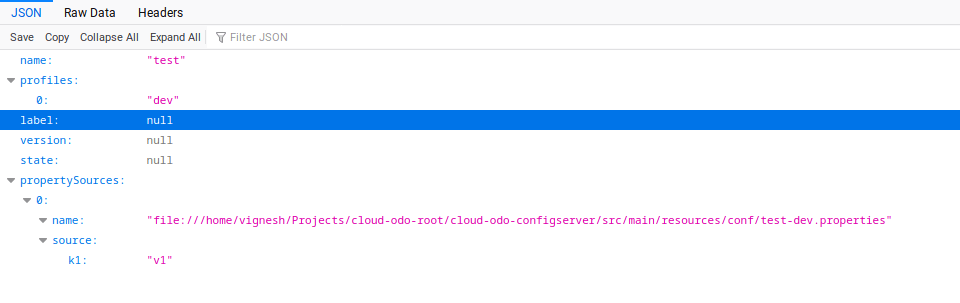
And run the Config Server application, You can verify the service by running
http://{host-name}:{port}/{application-name}/{application-profile}
Example : http://localhost:7777/test/dev
Config Client
Add a bootstrap or application.properties and configure the config server URL, in my case it is running on localhost and 7777 port.
Then add the application name and profile.
Create a component class with value as Key like mentioned in the ConfigBean.java
And run the application, you will get the variables populated with the value from the config server.
Please comment your queries or feedback here, happy to reply.
Keep connected with my GitHub profile for updates on the Cloud-odo project
Also published on Medium.