Netbean IDE support for php codeigniter framework
Recently I’ve been doing some development using CodeIgniter (a very popular PHP framework), I am using Net beans IDE and am looking for some IDE which supports CI framework finally i find a plug-in available for net beans under the Project Kenai
This kenai plug-in will allow you to create CI projects right from NetBeans
In this post I’ll explain how to get this plug-in to work.
First you should make sure that you have at least NetBeans 7.0 installed on your machine.
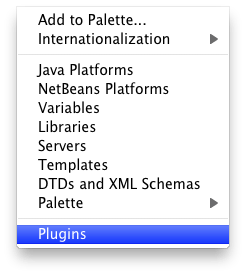
1. Go to Tools menu in Netbeans , then choose Plug-in, and then select the Settings tab.
2. Click on the Add button on the window
3. Type any name (or CI ) you find appropriate, and for the URL paste one of these links depending on your NetBeans version, and click Ok.
For NetBeans

7.0.1 use http://kenai.com/downloads/nbphpci/Latest_NetBeans701/updates.xml
7.1.1 use http://kenai.com/downloads/nbphpci/Latest_NetBeans711/updates.xml
7.1.2 use http://kenai.com/downloads/nbphpci/Latest_NetBeans712/updates.xml
7.2.0 use http://kenai.com/downloads/nbphpci/Latest_NetBeans720/updates.xml
7.3. use https://kenai.com/downloads/nbphpci/Latest_NetBeans730/updates.xml
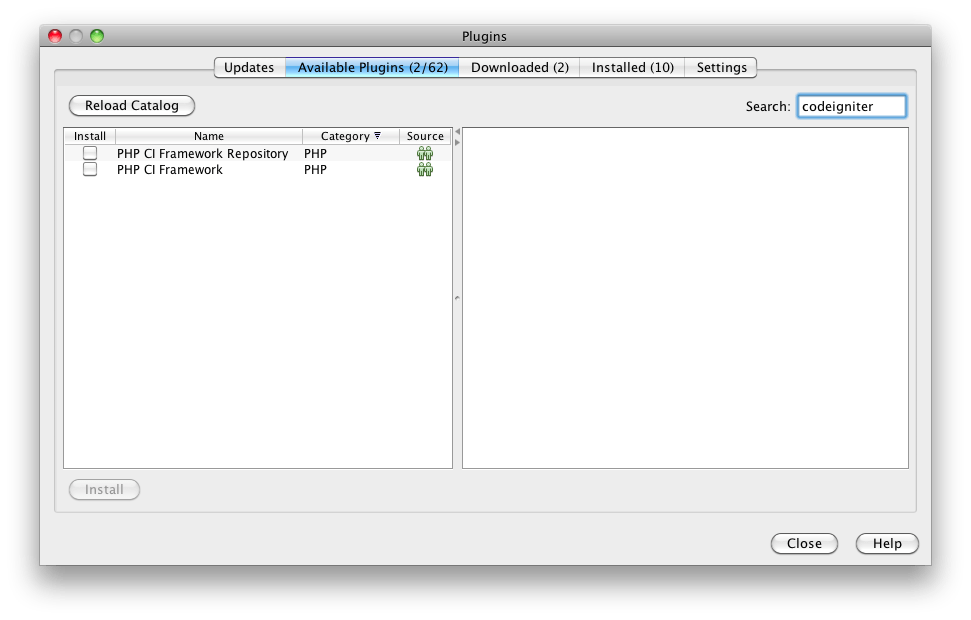
4. Go to the Available Plugins tab, and search for CodeIgniter, two plugins should appear (Framework and Framework Repository), check both of them and click Install.
5. Go to Tools menu, and choose Settings. Then go to PHP tab. You should find a new tab for CodeIgniter, switch to it.
6. Under Base Files click Add type an appropriate name in the name field (I used CodeIgniter 2.1.2), and browse to the CodeIgniter Directory .Finally hit the Ok button.
7. Now restart NetBeans, and once it’s restarted try to create a new PHP project via the File menu.
8. Go through the few steps of creating a new project, and at the final step under PHP Frameworks you should find CodeIgniter there, check it and hit Finish.
Netbeans autocomplete for Codeigniter 2.x
1. Create a new directory inside nbproject with your name of choice, I used “CI_AC”.
2. Create a new file with your name of choice, I used “CI_AC.php”, and place it inside the newly created folder, “nbprojectCI_AC”.
3. Paste the below code inside the new file, “CI_AC.php”.
<?php
/**
* @property CI_DB_active_record $db
* @property CI_DB_forge $dbforge
* @property CI_Benchmark $benchmark
* @property CI_Calendar $calendar
* @property CI_Cart $cart
* @property CI_Config $config
* @property CI_Controller $controller
* @property CI_Email $email
* @property CI_Encrypt $encrypt
* @property CI_Exceptions $exceptions
* @property CI_Form_validation $form_validation
* @property CI_Ftp $ftp
* @property CI_Hooks $hooks
* @property CI_Image_lib $image_lib
* @property CI_Input $input
* @property CI_Language $language
* @property CI_Loader $load
* @property CI_Log $log
* @property CI_Model $model
* @property CI_Output $output
* @property CI_Pagination $pagination
* @property CI_Parser $parser
* @property CI_Profiler $profiler
* @property CI_Router $router
* @property CI_Session $session
* @property CI_Sha1 $sha1
* @property CI_Table $table
* @property CI_Trackback $trackback
* @property CI_Typography $typography
* @property CI_Unit_test $unit_test
* @property CI_Upload $upload
* @property CI_URI $uri
* @property CI_User_agent $user_agent
* @property CI_Validation $validation
* @property CI_Xmlrpc $xmlrpc
* @property CI_Xmlrpcs $xmlrpcs
* @property CI_Zip $zip
*/
class CI_Controller {};
/**
* @property CI_DB_active_record $db
* @property CI_DB_forge $dbforge
* @property CI_Config $config
* @property CI_Loader $load
* @property CI_Session $session
*/
class CI_Model {};
?>
4. Restart your project and autocomplete “should” work.
Sources :
http://kenai.com
http://ellislab.com

I prefer to use Codelobster that has special plug-in for CodeIgniter autocomplete and so on: http://www.codelobster.com/codeigniter.html
Thanks for the Update…